ScummVM fullscreen on a Raspberry Pi TFT touchscreen

I managed to get ScummVM running on the 3.5″ Waveshare touchscreen. This is obviously only nice, if it runs fullscreen. Have a look:

For this to work, you need to adjust your openbox configuration, assuming you are running a default Raspbian with LXDE / openbox. Edit .config/openbox/lxde-pi-rc.xml and add the following to the applications section:

   <application class="scummvm" name="scummvm">  
<fullscreen>yes</fullscreen>
</application>

You can switch between fullscreen and windowed mode by pressing Alt+F11, in the default openbox configuration.

Next, you need to install scummvm and the OpenGL software rasterizer, since the touch screen frame buffer does not support the hardware OpenGL engine that the Pi provides:

$ sudo apt-get install scummvm mesa-utils libgl1-mesa-dri libgl1-mesa-swx11

This will also install dri drivers and some OpenGL utilities, such as glxgears to test performance.

Now you want to tell ScummVM to actually use the OpenGL backend driver, or else it will not scale to, but rather use the default 2x scaler, which is too large for the 480×320 display. Easiest way to do this is to edit ~/.scummvmrc (you have to have run ScummVM at least once for this) and edit the [scummvm] section to have these lines:

[scummvm]
last_fullscreen_mode_width=480
last_fullscreen_mode_height=320
gfx_mode=opengl_nearest

If gfx_mode or the other lines already exist, edit them to your liking.

Installing an ads7846 based Raspberry Pi TFT touchscreen (Waveshare 3.5″ LCD)

I have a Waveshare 3.5″ TFT touch screen for the Raspberry Pi. Those displays come with some software to help set it up. Sadly, this only works for Raspbian based on Debian 7. The new Raspbian Debian 8 (Jessie) does not play well with this setup. So here is what I did to make it work.

IMG_1808First of all, you need to upgrade the kernel on your brand new Jessie installation:

$ sudo rpi-update
$ sudo power off

I had to do the power off, or else the Pi would show only a black screen after reboot. YMMV.

Next up, we need to change the boot parameters, i.e. the /boot/config.txt and /boot/cmdline.txt. Add the following to the end of /boot/cmdline.txt:

fbcon=map:10 fbcon=font:ProFont6x11 logo.nologo

This chooses a smaller font for the framebuffer console and turns off the boot logo.

Second, add the following lines to the end of /boot/config.txt:

dtparam=audio=on
dtparam=spi=on
dtoverlay=ads7846,cs=1,penirq=17,penirq_pull=2,speed=1000000,keep_vref_on=1,swapxy=1,pmax=255,xohms=60,xmin=200,xmax=3900,ymin=200,ymax=3900
dtparam=i2c_arm=on
dtoverlay=w1-gpio-pullup,gpiopin=4,extpullup=1

Next step is setting up all the kernel modules. Make sure /etc/modules contains exactly these line:

spi-bcm2835
snd-bcm2835
i2c-bcm2708
i2c-dev
ads7846
flexfb
fbtft_device

The options for these modules have to be put in a file called /etc/modprobe.d/lcd.conf:

options flexfb  width=320  height=480  regwidth=16 init=-1,0xb0,0x0,-1,0x11,-2,250,-1,0x3A,0x55,-1,0xC2,0x44,-1,0xC5,0x00,0x00,0x00,0x00,-1,0xE0,0x0F,0x1F,0x1C,0x0C,0x0F,0x08,0x48,0x98,0x37,0x0A,0x13,0x04,0x11,0x0D,0x00,-1,0xE1,0x0F,0x32,0x2E,0x0B,0x0D,0x05,0x47,0x75,0x37,0x06,0x10,0x03,0x24,0x20,0x00,-1,0xE2,0x0F,0x32,0x2E,0x0B,0x0D,0x05,0x47,0x75,0x37,0x06,0x10,0x03,0x24,0x20,0x00,-1,0x36,0x28,-1,0x11,-1,0x29,-3
options fbtft_device debug=3 rotate=90 name=flexfb speed=16000000 gpios=reset:25,dc:24
options ads7846_device model=7846 cs=1 gpio_pendown=17  keep_vref_on=1 swap_xy=1 pressure_max=255 x_plate_ohms=60 x_min=200 x_max=3900 y_min=200 y_max=3900

Next up are the X11 configurations. First, add a file /etc/X11/xorg.conf.d/99-calibration.conf with the following content:

Section "InputClass"
    Identifier "calibration"
    MatchProduct "ADS7846 Touchscreen"
    Option "Calibration" "126, 3734, 3892, 199"
    Option "SwapAxes" "1"
EndSection

You also need to edit /usr/share/X11/xorg.conf.d/99-fbturbo.conf. It should already exist, and you need to make it have this content:

Section "Device"
        Identifier      "Allwinner A10/A13 FBDEV"
        Driver          "fbturbo"
        Option          "fbdev" "/dev/fb1"
        Option          "SwapbuffersWait" "true"
EndSection

The change is setting the fbdev to /dev/fb1, which is the touchscreen, instead of /dev/fb0, which is the HDMI output.

Last but not least, you may want to install the input calibration tool:

$ sudo apt-get install xinput-calibrator

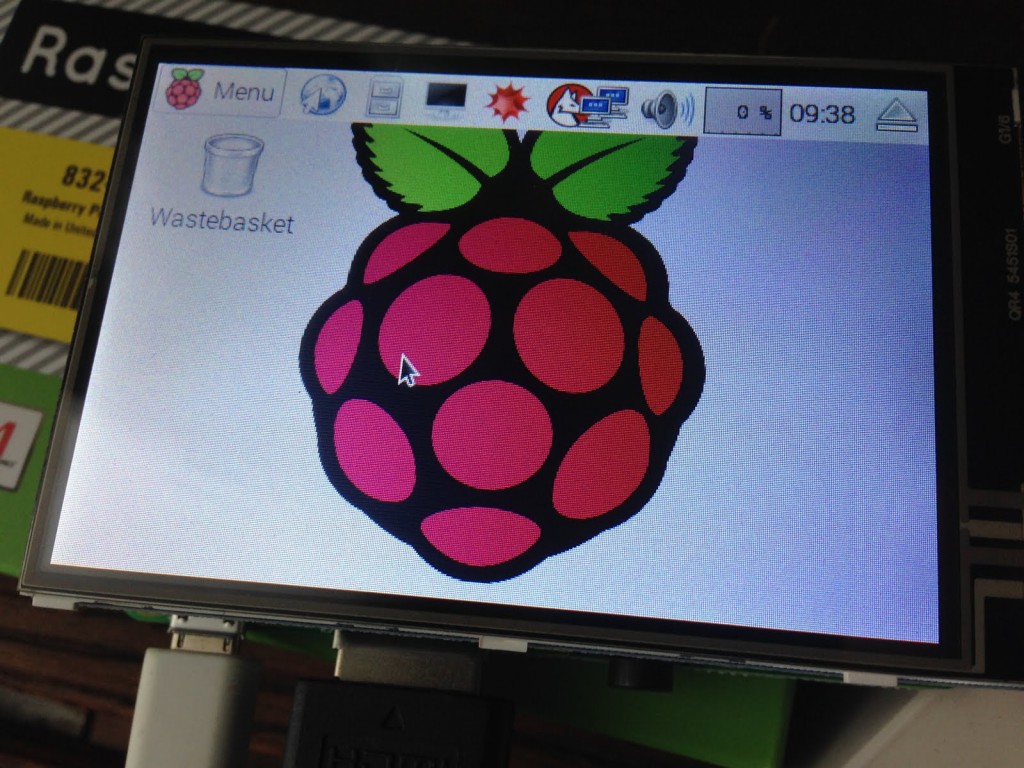
After all this, reboot and hopefully the Pi will reboot into a tiny X11 session on the touch screen.

You can calibrate the display by running this, e.g. via an ssh session:

$ DISPLAY=:0 xinput_calibrator 
Calibrating EVDEV driver for "ADS7846 Touchscreen" id=6
        current calibration values (from XInput): min_x=3932, max_x=300 and min_y=294, max_y=3801

Doing dynamic recalibration:
        Swapping X and Y axis...
        Setting calibration data: 2763, 2763, 2942, 2978
        --> Making the calibration permanent 
  copy the snippet below into '/etc/X11/xorg.conf.d/99-calibration.conf' (/usr/share/X11/xorg.conf.d/ in some distro's)
Section "InputClass"
        Identifier      "calibration"
        MatchProduct    "ADS7846 Touchscreen"
        Option  "Calibration"   "2763 2763 2942 2978"
        Option  "SwapAxes"      "1"
EndSection

You simply have to replace the calibration and swap axes lines into your /etc/X11/xorg.conf.d/99-calibration.conf, which we created earlier.

How to setup mDNS lookups on the Raspberry Pi

I’ve got the new Raspberry Pi 2, and was setting it up the other day. The first thing that annoys me with vanilla Debian installations is that they don’t have mDNS/zeroconf/avahi enabled by default. This technology is very useful, since it helps you to advertise services on you local network, lets you resolve host names without the need for setting up a DNS server and much more.

Especially the convenience of not having to remember IP-addresses for your machines is worth the work to set this up. With DHCP you might not even get the same IP for every machine every time.

For this to work, I asked a question over at the Linux & Unix StackExchange. So parts of this blog entry are taken from there.

First, you might want to install avahi on your RasPi;

sudo apt-get install avahi-daemon

This should help with the Pi being resolvable by name from other machines — which also have to support mDNS. For example Macs will come with mDNS-lookup enabled. So you should be able to ping your Pi just by using its name plus the local-domain:

ping raspberrypi.local

Next, you want to install the client side name service support for mDNS:

sudo apt-get install libnss-mdns

Make sure that the /etc/nsswitch.conf contains this line:

hosts: files mdns4_minimal [NOTFOUND=return] dns mdns4

There is probably already a line starting with “hosts:”, which you can simple comment out with the #-sign.

For added convenience, you may want to add the sshd to the advertised services of avahi. Simply add a file /etc/avahi/services/ssh.service containing the following lines:


<?xml version="1.0" standalone='no'?><!--*-nxml-*-->
<!DOCTYPE service-group SYSTEM "avahi-service.dtd">
<service-group>
<name replace-wildcards="yes">%h</name>
<service>
<type>_ssh._tcp</type>
<port>22</port>
</service>
</service-group>

This should let you use mDNS on you Pi, see the advertised services on you other machines in the local network. If you are using Plex Media Server (see this great post), it will also utilize avahi to advertise its services.

How to backup your Raspberry Pi SD-Card

In the following I will explain on how you can backup your Pi’s SD-card, so that whenever it breaks down, you can simply restore the backup image to a fresh SD-Card. This may also help with tinkering, when you totally screwed up your Pi’s Linux-installation. I will explain the first step specifically for Mac OS X, but you can do this similarly on other UNIXes and Linux, by using the mount and umount commands.

So, shut down your Pi using the command sudo shutdown -h now and remove the SD-card after the Pi has done so. Take the card and insert it into your Mac’s SD-card slot.

First of all, we need to find out which disk device has been assigned to the card. We can do this with diskutil list:

user@mymacintosh:~ $ diskutil list                                                                
/dev/disk0                                                                                            
   #:                       TYPE NAME                    SIZE       IDENTIFIER                        
   0:      GUID_partition_scheme                        *512.1 GB   disk0                             
   1:                        EFI EFI                     209.7 MB   disk0s1                           
   2:                  Apple_HFS M4                      511.1 GB   disk0s2                           
   3:                 Apple_Boot Recovery HD             784.2 MB   disk0s3                           
/dev/disk1                                                                                            
   #:                       TYPE NAME                    SIZE       IDENTIFIER                        
   0:     FDisk_partition_scheme                        *15.9 GB    disk1                             
   1:             Windows_FAT_32                         58.7 MB    disk1s1                         
   2:                      Linux                         15.9 GB    disk1s2                           

Then unmount the card using diskutil unmountDisk:

user@mymacintosh:~ $ diskutil umountDisk /dev/disk1                                              
Unmount of all volumes on disk1 was successful                                                     

Next we will use dd to produce an image, which we can compress using bzip2, or pbzip2 for more performance. You can use MacPorts to install pbzip2.

user@mymacintosh:~ $ sudo dd if=/dev/disk1 | pbzip2 > raspberry_pi_$(date “+%Y-%m-%d”).img.bz2 
31116288+0 records in                                                                                                           
31116288+0 records out                                                                                                        
15931539456 bytes transferred in 2347.692010 secs (6786043 bytes/sec)                                                           

Restoring the image is also easy:

user@mymacintosh:~ $ bunzip2 raspberry_pi_2014-03-22.img.bz2 | sudo dd of=/dev/disk1      

How to use find and rsync to copy a bunch of files to a local or remote destination

I use rsync a lot. And I use find a lot. You can use them both together, by using the magnificent xargs command. Two problems are there to solve: xargs usually just pastes the arguments from find at the end of the specified command. No way to specify the destination directory. Second, file names with spaces are a problem.

The solutions are:

  • The -print0 option of find uses 0-bytes to separate results, instead of spaces and newlines
  • The -0 option of xargs tells xargs to look for said 0-bytes
  • The -J option of xargs allows us to tell xargs where to put the file names that we feed to it.

So let’s put it together:

pi@raspberrypi ~ $ find . -name ‘your*pattern.jpg’ -print0 | xargs -J % -0 rsync -aP % user@host:some/dir/

Thanks to redeyeblind for the insightful blog post.

How to run tmux via ssh instantly

With my Raspberry Pi, what I do very, very often is this:

localhost$ ssh raspberrypi.local    # Here I already type the next command and wait a while
raspberrypi$ tmux attach

This is all well and good, but sometimes the Pi is down, and I will attach to one of my local tmux sessions. Very annoying. Instead you could try to do this:

localhost$ ssh raspberrypi.local tmux attach
not a terminal

Well, that did no good. So a look at the man-page of ssh or a quick search reveals this gem:

localhost$ ssh raspberrypi.local -t tmux attach

This allocates a pseudo terminal, which is needed by tmux to function correctly. This is also done by ssh, if no command is given, but a login shell is spawned.

Avoiding page allocation failures on the Pi

Since I’ve been using my 256MB Model B Pi as a server, I had been getting regular page allocation failures of the following kind:


sshd: page allocation failure: order:0, mode:0x20

This is rather annoying and seems to affect stability as well, like disrupted ssh or smb connections. It seems that the kernel has a setting to affect the minimum free memory that it keeps for allocations, which may be too low. So in the /etc/sysctl.conf file you can edit the last lines to bump this value from 8 Mbegabytes to 16 Megabytes:


# rpi tweaks
vm.swappiness=1
vm.min_free_kbytes = 16184

Settings are effective after a reboot. For me, this seems to fix the problem. But to be extra sure, I also changed the memory split from 192/64 to 224/32. Since my Pi runs headless, 64 MBytes seemed too much simply for a framebuffer console that is not even used. So after these tweaks my Pi shows 216 MByte of available memory and is running for some days now without page allocation errors.

Delay warnings when using USB audio on the Raspberry Pi

My kernel.log and debug log files had grown to over 2 GBytes each. This was due to log messages of this kind:


delay: estimated 0, actual 133

As another blog stated, this can be fixed by adding a parameter to the sound-usb-audio module of Alsa. So I did the same thing, creating a file /etc/modprobe.d/snd_usb_audio.conf with this content:


options snd-usb-audio nrpacks=1

After restarting Alsa or a reboot, the problems were gone, the logfiles kept small.

The Raspberry Pi and Ralink rt2800 based WiFi dongles

I strongly discourage the usage of rt2800 based WiFi dongles with the Raspberry Pi. For some weeks I have been debugging why my Raspberry Pi freezes and crashes all the time. And it turns out that it is the WiFi dongle. I was using an Edimax EW-7711UTn, but the chip is also being used in other devices. There seems to be a bug report for the Raspbian kernel, and I have spent quite some time on the Raspberry forum at Stackexchange. Currently, I hooked up the Raspberry Pi via Ethernet directly to my router. This works fine, but the router is upstairs, while the Raspberry is supposed to be downstairs, connected to my stereo. So this is only a stopgap measure until I have found a WiFi dongle that does not crash the Pi. Hints are welcome.

Update: I now switched to a TP-Link TL-WN725N with a RTL8188CUS chip. This adapter is much smaller (no external antenna) and surprisingly also quite a bit faster. I achieve ~1.9 MByte/sec sustained point to point datarates via SMB. So far no crashes or other problems. I will continue testing, but it looks much better than with the Ralink chip.
Update 2: Almost four months into testing the RTL8188CUS based WiFi dongle and it runs absolutely fine. I have uptimes of almost a month without any problems. After that the Pi degrades due to some of the daemons leaking or memory fragmentation. But I think this is bearable!

How to make the mpdas run as a daemon

The other day I installed the mpdas, which is the audio scrobbler for the music player daemon. Since there’s no debian package for the Raspberry Pi, I compiled mpdas from scratch and installed it. Now I don’t want to run it manually each time the Raspberry Pi boots up. So I found a nice template for writing your own debian-style init-script. I changed it a little and also installed the daemon tool, to turn the interactive mpdas program into a daemon. Just run apt-get install daemon to install it. Then put the following file under /etc/init.d/mpdas and run update-rc.d mpdas defaults. Then mpdas will be run automatically upon boot. Oh, one more thing: put your mpdas configuration under /usr/local/etc/mpdasrc or adjust the DAEMONOPTS in the init script accordingly.


#!/bin/bash
### BEGIN INIT INFO
# Provides: mpdas
# Required-Start: $remote_fs $syslog $mpd
# Required-Stop: $remote_fs $syslog
# Default-Start: 2 3 4 5
# Default-Stop: 0 1 6
# X-Interactive: true
# Short-Description: Audio Scrobbler for mpd
# Description: Starts the Audio Scrobbler for the mpd music player daemon.
### END INIT INFO

DAEMON_PATH="/usr/bin/"

DAEMON=daemon
DAEMONOPTS="-u pi -r -X /usr/local/bin/mpdas"

NAME=mpdas
DESC="The mpdas audio scrobbler for mpd"
PIDFILE=/var/run/$NAME.pid
SCRIPTNAME=/etc/init.d/$NAME

case "$1" in
start)
printf "%-50s" "Starting $NAME..."
cd $DAEMON_PATH
PID=`$DAEMON $DAEMONOPTS > /dev/null 2>&1 & echo $!`
#echo "Saving PID" $PID " to " $PIDFILE
if [ -z $PID ]; then
printf "%sn" "Fail"
else
echo $PID > $PIDFILE
printf "%sn" "Ok"
fi
;;
status)
printf "%-50s" "Checking $NAME..."
if [ -f $PIDFILE ]; then
PID=`cat $PIDFILE`
if [ -z "`ps axf | grep ${PID} | grep -v grep`" ]; then
printf "%sn" "Process dead but pidfile exists"
else
echo "Running"
fi
else
printf "%sn" "Service not running"
fi
;;
stop)
printf "%-50s" "Stopping $NAME"
PID=`cat $PIDFILE`
cd $DAEMON_PATH
if [ -f $PIDFILE ]; then
kill -HUP $PID
printf "%sn" "Ok"
rm -f $PIDFILE
else
printf "%sn" "pidfile not found"
fi
;;

restart)
$0 stop
$0 start
;;

*)
echo "Usage: $0 {status|start|stop|restart}"
exit 1
esac