RGB LED Matrix with the Raspberry Pi
Here I show how to attach a WS2812 based LED strip or matrix to the Raspberry Pi.
Short introduction on how to actually install the rpi_ws218x library on the Pi:
-
- Install build essentials:
sudo apt-get update && sudo apt-get install build-essential python-dev git scons swig
- Clone the repository and build the library:
git clone https://github.com/jgarff/rpi_ws281x.git
cd rpi_ws281x
scons
- Compile and install the Python library:
cd python
sudo python setup.py install
- Install build essentials:
Also, I have written this small example program, large parts were taken from the supplied example programs in the repository:
#!/usr/bin/env python
import time
import math
import colorsys
from neopixel import *

# LED strip configuration:
LED_COUNT = 64      # Number of LED pixels.
LED_PIN = 18      # GPIO pin connected to the pixels (must support PWM!).
LED_FREQ_HZ = 800000  # LED signal frequency in hertz (usually 800khz)
LED_DMA = 10       # DMA channel to use for generating signal (try 10)
LED_BRIGHTNESS = 255  # Set to 0 for darkest and 255 for brightest
# True to invert the signal (when using NPN transistor level shift)
LED_INVERT = False

def plasma (w, h, t):
    out = [ Color( 0, 0, 0 ) for x in range( w * h ) ]
    for x in range( w ):
        for y in range( h ):
            hue = 4.0 + math.sin( t + x ) + math.sin( t + y / 4.5 ) \
                + math.sin( x + y + t ) + math.sin( math.sqrt( ( x + t ) ** 2.0 + ( y + 1.5 * t ) ** 2.0 ) / 4.0 )
            hsv = colorsys.hsv_to_rgb( hue / 8.0, 1, 1 )
            out[ x + y * w ] = Color( *[ int( round( c * 10.0 ) ) for c in hsv ] )
    return out

# Main program logic follows:
if __name__ == '__main__':
    # Create NeoPixel object with appropriate configuration.
    strip = Adafruit_NeoPixel(
        LED_COUNT,
        LED_PIN,
        LED_FREQ_HZ,
        LED_DMA,
        LED_INVERT,
        LED_BRIGHTNESS
    )
    # Intialize the library (must be called once before other functions).
    strip.begin()

    t = 0.0                                                                       # time
    dt = 0.1                                                                      # speed of time

    for i in range( 0, strip.numPixels(), 1):                                     # iterate over all LEDs
        strip.setPixelColor( i, Color( 0, 0, 0 ) )                                # set LED to black (off)

    while True:
        t = t + dt                                                                # increment time
        pic = plasma( 8, 8, t )                                                   # render plasma of size 8x8 at time t

        for i in range( 0, strip.numPixels(), 1 ):                                # iterate over all LEDs
            strip.setPixelColor(                                                  # set pixel to color in picture
                i,
                pic[ i ]
            )
        strip.show()                                                              # update LEDs
        time.sleep(0.001)                                                         # white a short while before loop
Assembling a DIY solder blinking LED circuit
Parsing compiler or grep output for emacsclient
This short bash snippet allows you to copy and paste any grep or compiler output of the form some/file.java:12:34 to emacsclient to jump to the specified file, line and column in Emacs:
function emacsClient()
{
  local IFS=":"
  set $1
  if [ $# -eq 3 ]
  then
    emacsclient -n +"$2:$3" "$1"
  elif [ $# -eq 2 ]
  then
    emacsclient -n +"$2:1" "$1"
  else
    emacsclient -n "$1"
  fi
}

alias ec=emacsClient
Example call:
$ grep -nH custom init.el
init.el:93:  (setq custom-file (expand-file-name "custom.el" (or (file-name-directory user-init-file) default-directory)))
init.el:94:  (load custom-file)
init.el:95:  (global-set-key (kbd "") '(lambda () (interactive) (load custom-file)))
$ ec init.el:95:
$
Update: I forgot to make the IFS variable local to the function. This would break things like git-bash-prompt, if the IFS is suddenly set to something else.
Simple rsync backup of your remote server w/ crontab
If you have a remote server, e.g. for you website, small business or whatever, it is a good idea to replicate it regularly onto local storage. You at least want /etc, /home, /var/www, /usr/local to be in the backup. Maybe more stuff, depending on what you are doing.
For now I assume you are running the backup on OS X’s user with admin/sudo rights, or some Linux user with sudo rights.
The reason why we want to do this with sudo and root on the remote system is to have a simple way to backup the whole system with all files, users and permissions. If you only want to backup a remote user, you don’t need the whole sudo and root part, but can use the remote user login instead.
First, you need the backup script:
#!/bin/bash

if [ "${UID}" != 0 ]
then
    echo "Must be run as root."
    exit 1
fi

shopt -s nocasematch

pushd `dirname $0` > /dev/null
SCRIPTPATH=`pwd`
popd > /dev/null

if [[ "${PWD}" != "${SCRIPTPATH}" ]]
then
    echo "Wrong path: ${PWD}"
    exit 2
fi

RSYNC_RSH="ssh -C -o IdentitiesOnly=yes -i /Path/to/key/without/password"
RSYNC_CMD='rsync -aP --delete --delete-after'
RSYNC_HOSTNAME='your.server.name'

($RSYNC_CMD -e "${RSYNC_RSH}" root@${RSYNC_HOSTNAME}:/etc :/home :/root :/usr/local :/var/www . > /tmp/rsync.log 2>&1 ) || \
(>&2 echo "An error occured while doing the backup: " ; cat /tmp/rsync.log )

exit $?
Adjust your hostname accordingly and also the directories to be backed up. Use the :/dir notation to reuse the SSH connection. Also make sure to use SSH key authentication, so no password is needed, since this backup is supposed to run via crontab. SSH access as root must only be allowed via key exchange! Make sure to disable password access, or else you are running a security risk! Also, keep the SSH key secret — it is the door to your server!
There are probably more secure ways, but they are more complicated than this.
Next up, put you script somewhere your sudo user can run it, and edit the crontab via “crontab -e”:
MAILTO=user@domain  # or simply your local user, to put it into the local mbox
0 * * * *       cd /Users/youruser/Documents/Backup && sudo /Users/youruser/Documents/Backup/backup.sh
You can make the script runnable with sudo without password by adding the following line to your /etc/sudoers file:
# allow passwordless access to the backup script
youruser ALL = (ALL) NOPASSWD: /Users/youruser/Documents/Backup/backup.sh
The script will only generate output on an error, hence cron will only send an email if there is an error.
If you are now also running TimeMachine, your server will have a nice, hourly history of backups.
Indexed Java 8 enums with gaps
This is an example enum for Java 8 that supports gaps in its indices is relatively fast for enums with a large amount of values:
import java.util.Arrays;
import java.util.Map;
import java.util.stream.Collectors;

public enum TestEnum {
   VALUE1( 0 ),
   VALUE2( 2 ),
   VALUE3( 50 );

   private final Integer id_;
   private static Map< Integer, TestEnum > values_ =
      Arrays.stream( TestEnum.values() ).collect( Collectors.toMap(e -> e.id_, e -> e) );;

   private TestEnum( int i ) { id_ = i; }
   public static TestEnum fromInteger( int i )
   {
      return values_.get( i );
   }

}
How to concatenate strings efficiently in bash
The naive implementation for concatenating strings in bash goes something like this:
#!/bin/bash

statement="1234567890"

result=""

for i in $(seq 1 100000)
do
  result=${result}${statement}
done

wc <<< ${result}
This takes around two minutes on a modern machine. This is slow. Very, very slow.
Instead you can build an intermediate array and use the star operator to expand it into a string. Make sure to change the input field seperator to empty, so that you don’t get spaces in between the individual entries:
#!/bin/bash

statement="1234567890"

for i in $(seq 1 100000)
do
statements[${#statements[@]}]=${statement}
done

IFS= eval 'result="${statements[*]}"'

wc <<< ${result}
This will run in a few hundred milliseconds. You get roughly three orders of magnitude speedup.
ScummVM fullscreen on a Raspberry Pi TFT touchscreen
I managed to get ScummVM running on the 3.5″ Waveshare touchscreen. This is obviously only nice, if it runs fullscreen. Have a look:
For this to work, you need to adjust your openbox configuration, assuming you are running a default Raspbian with LXDE / openbox. Edit .config/openbox/lxde-pi-rc.xml and add the following to the applications section:
   <application class="scummvm" name="scummvm">
     <fullscreen>yes</fullscreen>
   </application>
You can switch between fullscreen and windowed mode by pressing Alt+F11, in the default openbox configuration.
Next, you need to install scummvm and the OpenGL software rasterizer, since the touch screen frame buffer does not support the hardware OpenGL engine that the Pi provides:
$ sudo apt-get install scummvm mesa-utils libgl1-mesa-dri libgl1-mesa-swx11
This will also install dri drivers and some OpenGL utilities, such as glxgears to test performance.
Now you want to tell ScummVM to actually use the OpenGL backend driver, or else it will not scale to, but rather use the default 2x scaler, which is too large for the 480×320 display. Easiest way to do this is to edit ~/.scummvmrc (you have to have run ScummVM at least once for this) and edit the [scummvm] section to have these lines:
[scummvm]
last_fullscreen_mode_width=480
last_fullscreen_mode_height=320
gfx_mode=opengl_nearest
If gfx_mode or the other lines already exist, edit them to your liking.
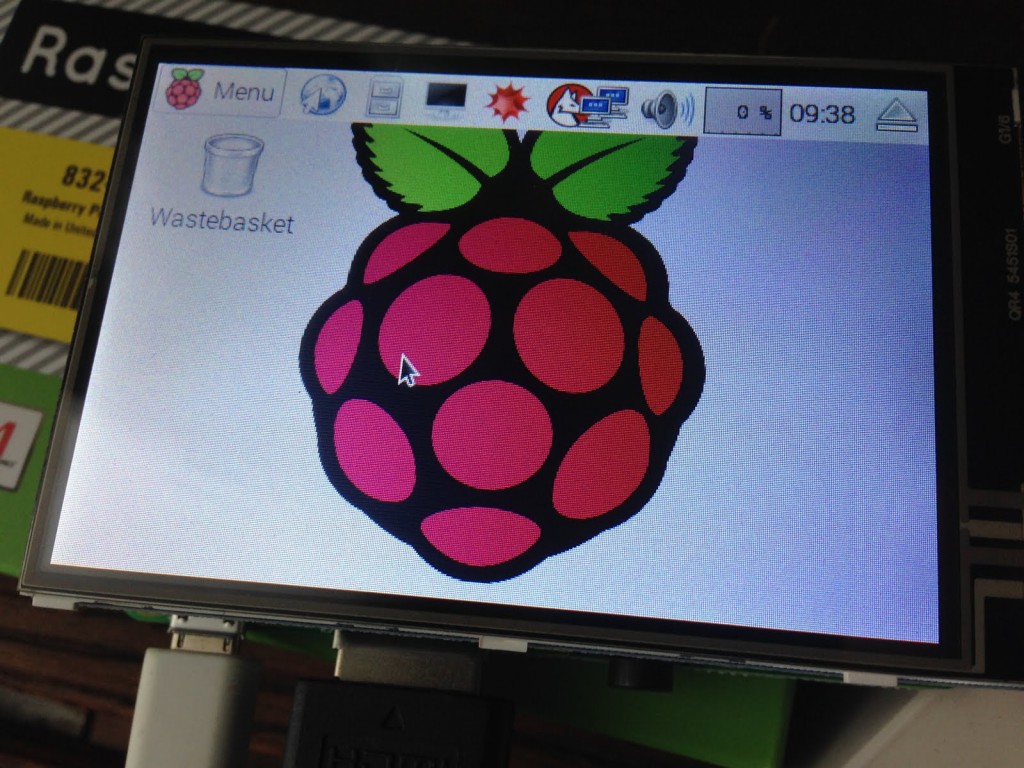
Installing an ads7846 based Raspberry Pi TFT touchscreen (Waveshare 3.5″ LCD)
I have a Waveshare 3.5″ TFT touch screen for the Raspberry Pi. Those displays come with some software to help set it up. Sadly, this only works for Raspbian based on Debian 7. The new Raspbian Debian 8 (Jessie) does not play well with this setup. So here is what I did to make it work.
 First of all, you need to upgrade the kernel on your brand new Jessie installation:
$ sudo rpi-update
$ sudo power off
I had to do the power off, or else the Pi would show only a black screen after reboot. YMMV.
Next up, we need to change the boot parameters, i.e. the /boot/config.txt and /boot/cmdline.txt. Add the following to the end of /boot/cmdline.txt:
fbcon=map:10 fbcon=font:ProFont6x11 logo.nologo
This chooses a smaller font for the framebuffer console and turns off the boot logo.
Second, add the following lines to the end of /boot/config.txt:
dtparam=audio=on
dtparam=spi=on
dtoverlay=ads7846,cs=1,penirq=17,penirq_pull=2,speed=1000000,keep_vref_on=1,swapxy=1,pmax=255,xohms=60,xmin=200,xmax=3900,ymin=200,ymax=3900
dtparam=i2c_arm=on
dtoverlay=w1-gpio-pullup,gpiopin=4,extpullup=1
Next step is setting up all the kernel modules. Make sure /etc/modules contains exactly these line:
spi-bcm2835
snd-bcm2835
i2c-bcm2708
i2c-dev
ads7846
flexfb
fbtft_device
The options for these modules have to be put in a file called /etc/modprobe.d/lcd.conf:
options flexfb  width=320  height=480  regwidth=16 init=-1,0xb0,0x0,-1,0x11,-2,250,-1,0x3A,0x55,-1,0xC2,0x44,-1,0xC5,0x00,0x00,0x00,0x00,-1,0xE0,0x0F,0x1F,0x1C,0x0C,0x0F,0x08,0x48,0x98,0x37,0x0A,0x13,0x04,0x11,0x0D,0x00,-1,0xE1,0x0F,0x32,0x2E,0x0B,0x0D,0x05,0x47,0x75,0x37,0x06,0x10,0x03,0x24,0x20,0x00,-1,0xE2,0x0F,0x32,0x2E,0x0B,0x0D,0x05,0x47,0x75,0x37,0x06,0x10,0x03,0x24,0x20,0x00,-1,0x36,0x28,-1,0x11,-1,0x29,-3
options fbtft_device debug=3 rotate=90 name=flexfb speed=16000000 gpios=reset:25,dc:24
options ads7846_device model=7846 cs=1 gpio_pendown=17  keep_vref_on=1 swap_xy=1 pressure_max=255 x_plate_ohms=60 x_min=200 x_max=3900 y_min=200 y_max=3900
Next up are the X11 configurations. First, add a file /etc/X11/xorg.conf.d/99-calibration.conf with the following content:
Section "InputClass"
    Identifier "calibration"
    MatchProduct "ADS7846 Touchscreen"
    Option "Calibration" "126, 3734, 3892, 199"
    Option "SwapAxes" "1"
EndSection
You also need to edit /usr/share/X11/xorg.conf.d/99-fbturbo.conf. It should already exist, and you need to make it have this content:
Section "Device"
        Identifier      "Allwinner A10/A13 FBDEV"
        Driver          "fbturbo"
        Option          "fbdev" "/dev/fb1"
        Option          "SwapbuffersWait" "true"
EndSection
The change is setting the fbdev to /dev/fb1, which is the touchscreen, instead of /dev/fb0, which is the HDMI output.
Last but not least, you may want to install the input calibration tool:
$ sudo apt-get install xinput-calibrator
After all this, reboot and hopefully the Pi will reboot into a tiny X11 session on the touch screen.
You can calibrate the display by running this, e.g. via an ssh session:
$ DISPLAY=:0 xinput_calibrator
Calibrating EVDEV driver for "ADS7846 Touchscreen" id=6
        current calibration values (from XInput): min_x=3932, max_x=300 and min_y=294, max_y=3801

Doing dynamic recalibration:
        Swapping X and Y axis...
        Setting calibration data: 2763, 2763, 2942, 2978
        --> Making the calibration permanent
  copy the snippet below into '/etc/X11/xorg.conf.d/99-calibration.conf' (/usr/share/X11/xorg.conf.d/ in some distro's)
Section "InputClass"
        Identifier      "calibration"
        MatchProduct    "ADS7846 Touchscreen"
        Option  "Calibration"   "2763 2763 2942 2978"
        Option  "SwapAxes"      "1"
EndSection
You simply have to replace the calibration and swap axes lines into your /etc/X11/xorg.conf.d/99-calibration.conf, which we created earlier.
How to setup mDNS lookups on the Raspberry Pi
I’ve got the new Raspberry Pi 2, and was setting it up the other day. The first thing that annoys me with vanilla Debian installations is that they don’t have mDNS/zeroconf/avahi enabled by default. This technology is very useful, since it helps you to advertise services on you local network, lets you resolve host names without the need for setting up a DNS server and much more.
Especially the convenience of not having to remember IP-addresses for your machines is worth the work to set this up. With DHCP you might not even get the same IP for every machine every time.
For this to work, I asked a question over at the Linux & Unix StackExchange. So parts of this blog entry are taken from there.
First, you might want to install avahi on your RasPi;
sudo apt-get install avahi-daemon
This should help with the Pi being resolvable by name from other machines — which also have to support mDNS. For example Macs will come with mDNS-lookup enabled. So you should be able to ping your Pi just by using its name plus the local-domain:
ping raspberrypi.local
Next, you want to install the client side name service support for mDNS:
sudo apt-get install libnss-mdns
Make sure that the /etc/nsswitch.conf contains this line:
hosts: files mdns4_minimal [NOTFOUND=return] dns mdns4
There is probably already a line starting with “hosts:”, which you can simple comment out with the #-sign.
For added convenience, you may want to add the sshd to the advertised services of avahi. Simply add a file /etc/avahi/services/ssh.service containing the following lines:
<?xml version="1.0" standalone='no'?><!--*-nxml-*-->
<!DOCTYPE service-group SYSTEM "avahi-service.dtd">
<service-group>
  <name replace-wildcards="yes">%h</name>
  <service>
     <type>_ssh._tcp</type>
     <port>22</port>
  </service>
</service-group>
This should let you use mDNS on you Pi, see the advertised services on you other machines in the local network. If you are using Plex Media Server (see this great post), it will also utilize avahi to advertise its services.